What We DIY’d
Simplistic and romantic with a hint of whimsical
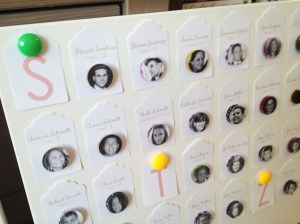
Photo Table Cards
Instead of the typical, simple, tried-and-true, bi-fold table cards with names and table numbers, we wanted to personalize each one. What better way to do it by including each guest’s photo on theirs? We had 162 guests at our wedding and even we were surprised to be able to compile all of the headshots. With the exception of a handful of friends’ plus-ones, this exercise reaffirmed to us that we did a great job of fleshing out our guestlist with our closest family and friends. Even though we had a medium-sized wedding, it truly was a very intimate affair.
Materials needed: White cardstock, patterned paper, a glue stick, paper punches for 1-inch circles and 3-inch tags, magnets, and a trusty printer with a healthy supply of ink.
Tutorial: Print names and table numbers on cardstock. Punch tags out the cardstock. Punch patterned circles and glue on each card. Be a creep on Facebook, and download and print each guest’s face on cardstock. Glue faces on magnet. Set up cards and magnets on metal boards. To make it easier for your friends to find their cards, print letters on cardstock and punch with the tag puncher. Alphabetize.

Printed Schedules
One thing we knew we’d need were printed schedules for the bridal party, friends and family doing readings and out-of-town guests who were part of the festivities leading up to the big day. Since certain attendants would have to be at different places, at different times, we created print schedules for each “VIP” guest.
Materials: Cardstock, paper punches for 1-inch tags, and a trusty printer with a healthy supply of ink.
Tutorial: Create template in photoshop. Develop different versions for different groupings of guests (for instance, all bridesmaids received the same schedule). Print all “VIP” guests’ names on patterned paper. Punch 1-inch with names from patterned paper. Glue names on each schedule. Hand out to “VIP” guests or ask the hotel to hand it out at check-in. We gave them to everyone at the rehearsal dinner.

Framed Signage
Even though wedding guests have been there, done that — they know what to do when they see a birdcage and guestbook — including framed signage with a personal touch adds a touch of decor to otherwise somewhat-naked tables at the reception and cocktail hour.
Materials: Cardstock, plastic frames, wedding stickers, and a trusty printer with a healthy supply of ink.
Tutorial: Create signage in Photoshop and print. Asphyxiate wedding stickers on signage. Set up in frame. Display.

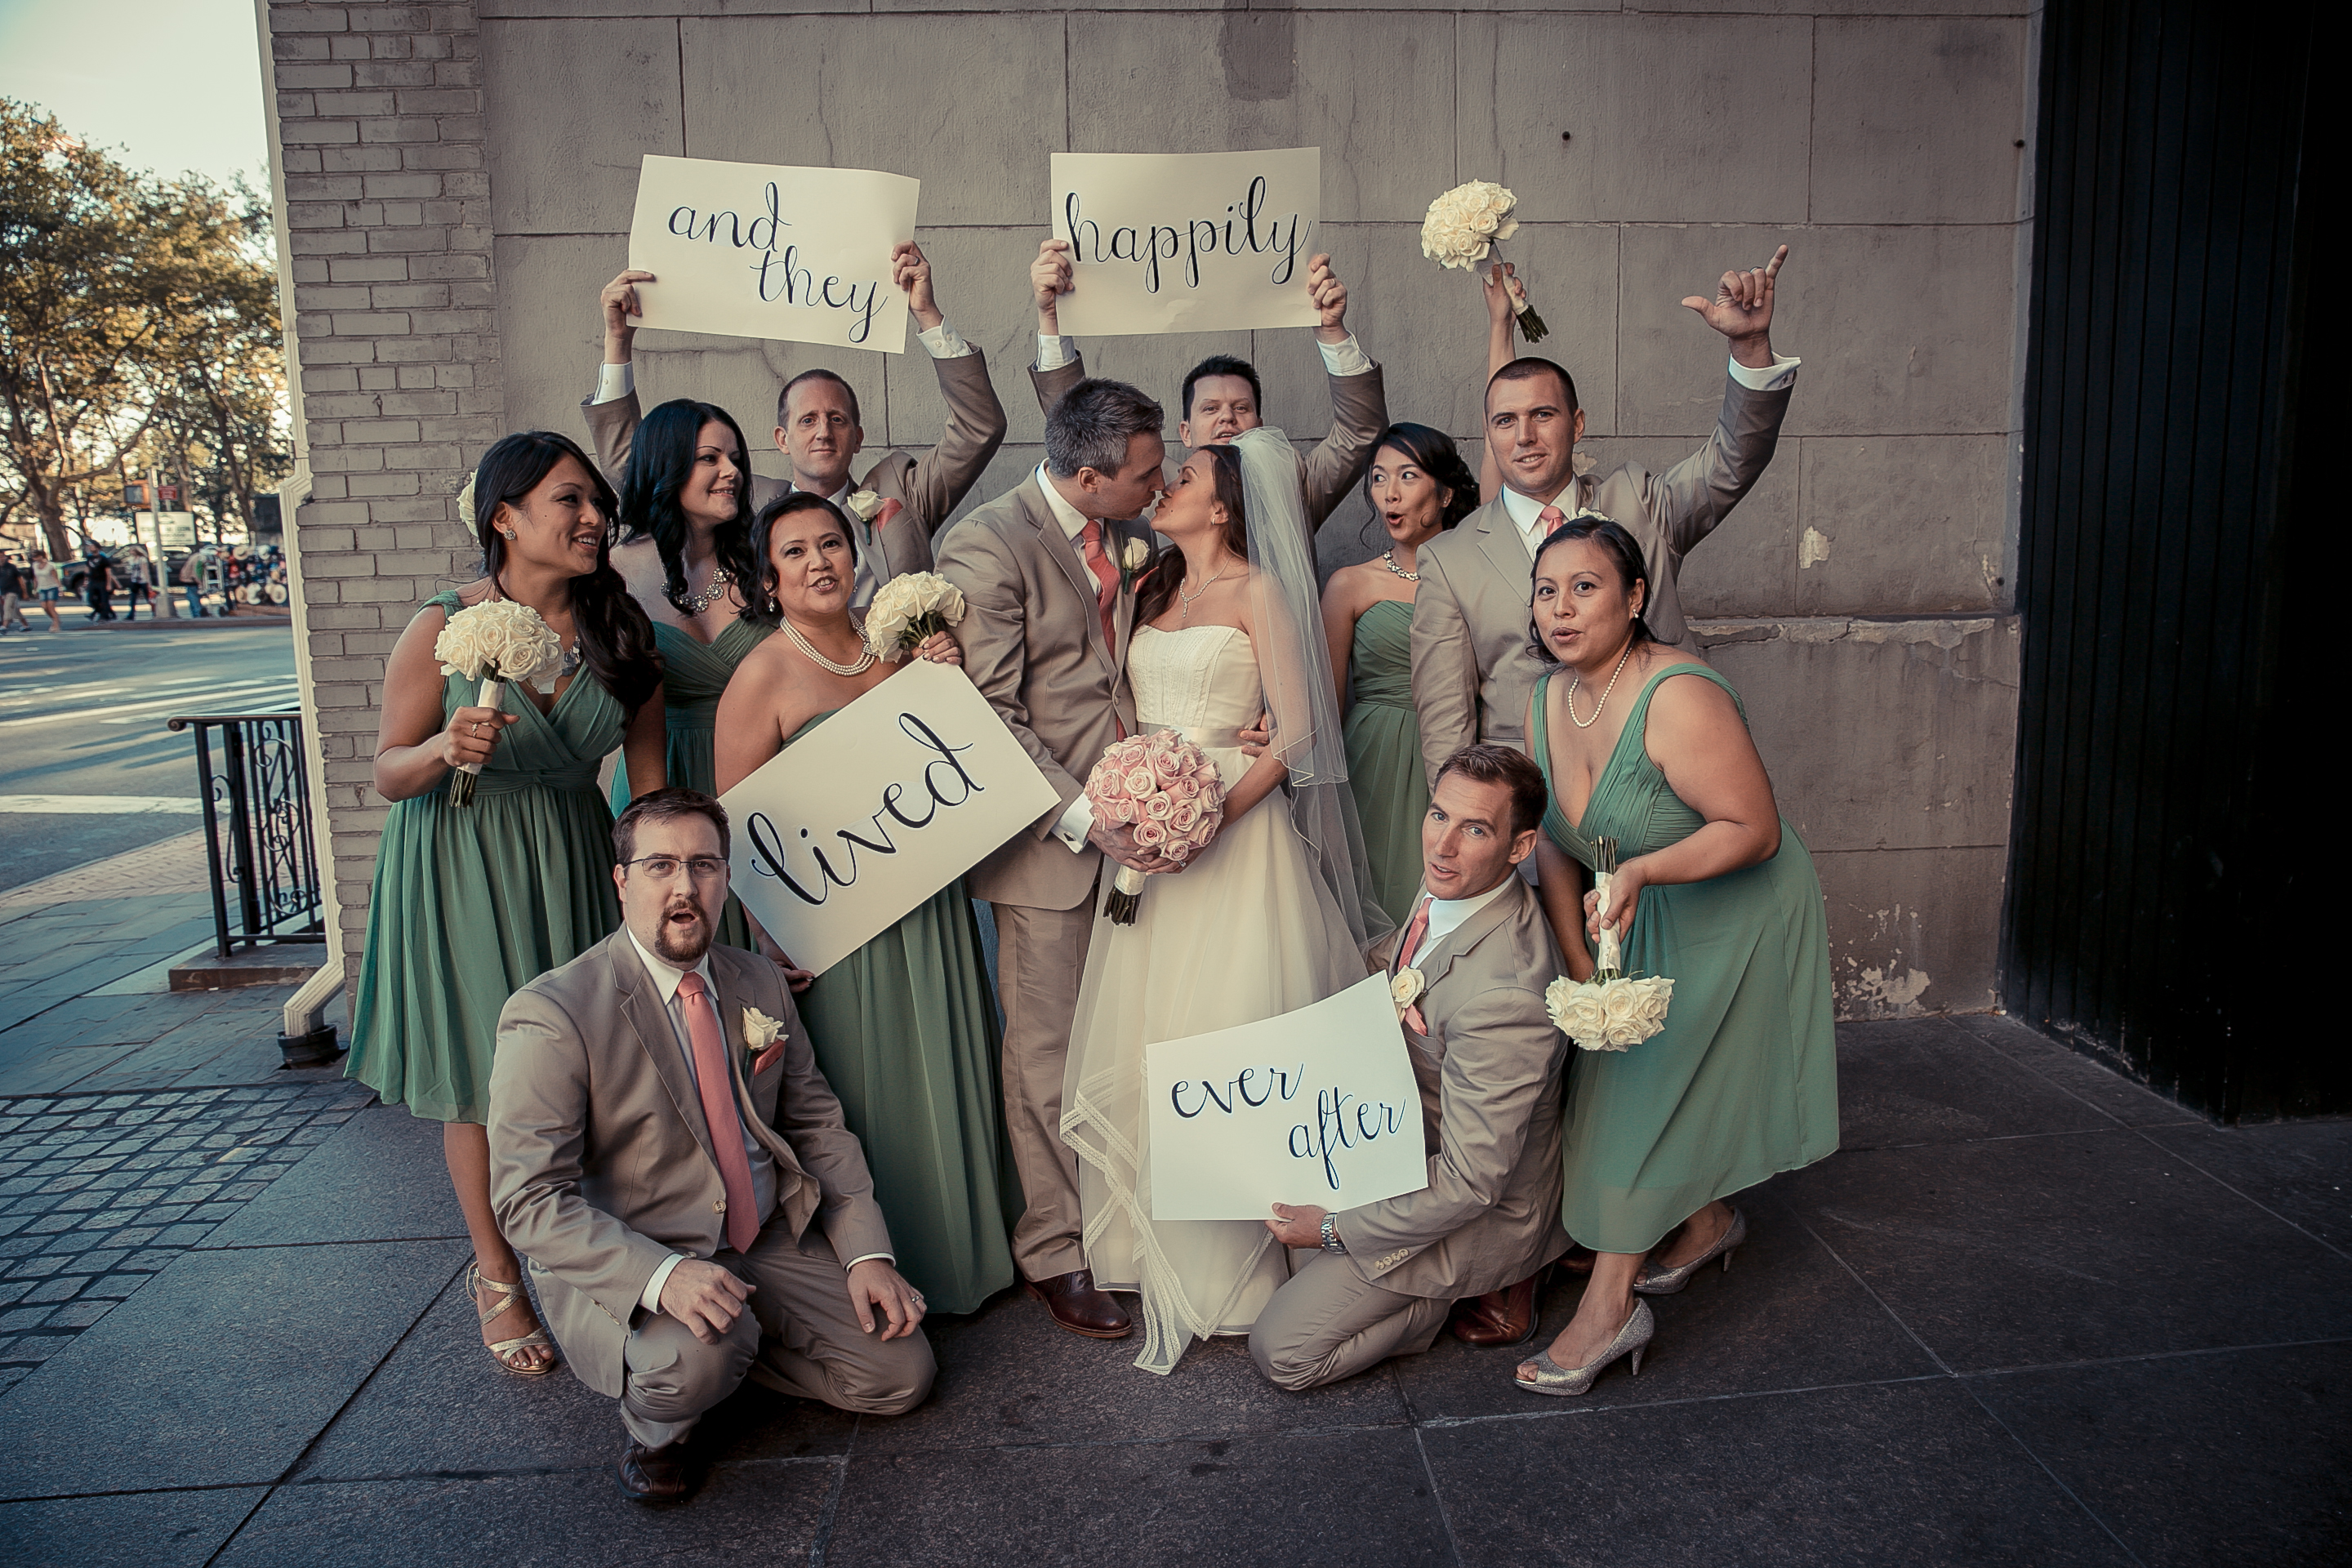
Our “Happily Ever After”
I was inspired by a tarot card reading where I pulled the “happily ever after” card… We brought the concept and wish to our photos by printing large signs with the words, and had our bridal party hold them during a picture-taking session immediately after our ceremony. We are so pleased with the results. This picture will surely be framed and grace our living room.
What We Bought
Etsy Accents
Where would brides be without Etsy? We scored these custom finds from the online marketplace on a budget, and were thrilled at the results.
From left: Our wedding invitations (excluding the custom infographic-style map created by a friend who’s also a talented graphic designer), guestbook poster, bird cake toppers and ring bearers’ ties.
Note: If you’d like the contact information for the Etsy vendors we bought from, send me an email!


Party Favors
Buying in bulk on Etsy is not as easy. For party favors for our 160+ guests, we turned to The Knot Shop to buy these adorable “Meant to Bee” candles with metallic bees (FYI, I also had bee-themed clips in my hair on my wedding day), and personalized matchbooks.

Balloons for Pictures’ Sake
Thank you, BalloonPlanet.com for making our vision a reality. We wanted to insert big pops of color with balloons, so we went with 3-foot pink and green balloons to match our wedding theme colors. And no, these balloons were not so powerful that they took my groom away. Jesse is just a good actor/model. We released the balloons after a handful of “money” shots.

 We started this site to plan and keep people updated about our wedding. Now that that's done, we decided to continue to blog so we can look back at how we've grown -- together.
Ysolt, that was very nicely done. I like your simple directions.